Eye of the Storm
Eye of the Storm is a Ward faction main mission in STALKER 2: Heart of Chornobyl. Read on for a complete walkthrough of Eye of the Storm, as well as the rewards for completing the mission.
| ◄ Previous Mission | Next Mission ▶ |
|---|---|
| Down Below | The Last Step |
List of Contents
- Walkthrough
- Rewards
- Overview
- Related Guides
Eye of the Storm Walkthrough
| Notice from Game8 | This main mission is exclusive to the Ward ending route of STALKER 2. Only players who chose to side with Korshunov and the Ward will have access to this mission. |
|---|---|
| List of Objectives | - |
| 1 | Find the Workstation in SPCC Bunker |
| 2 | Find the Alpha Bunker |
| 3 | Restore Power in the Alpha Bunker |
| 4 | Find the Beta Bunker |
| 5 | Find the Workstation in the Beta Bunker |
| 6 | Cross the Ruined Bridge to Reach the Generators |
Find the Workstation in SPCC Bunker
At the end of Down Below (when allied with the Ward Faction), you'll use a teleporter that takes you to the SPCC bunker in Dark Valley. Once you arrive in the bunker, follow the quest marker to find the bunker's Workstation.
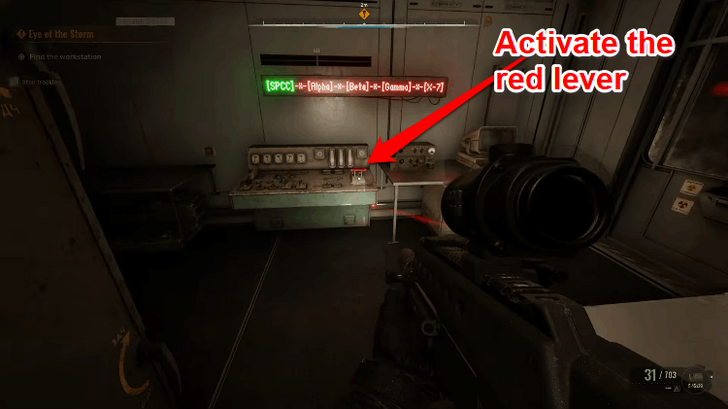
Activate the red lever on the control panel to protect yourself from the Emissions and complete the objective. You'll be doing this for the remaining 3 bunkers you visit during the mission.
Find the Alpha Bunker
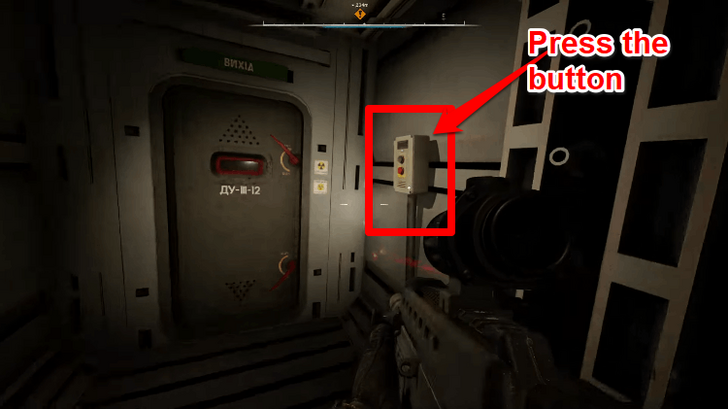
Once the Emission dies down, exit the bunker via its front door. Press the button next to the doorway to open the bulkhead door. Once you step outside, you will start taking psi-damage. Make a beeline for the next bunker before the next emission hits.
Climb the Fallen Debris to Enter Bunker Alpha
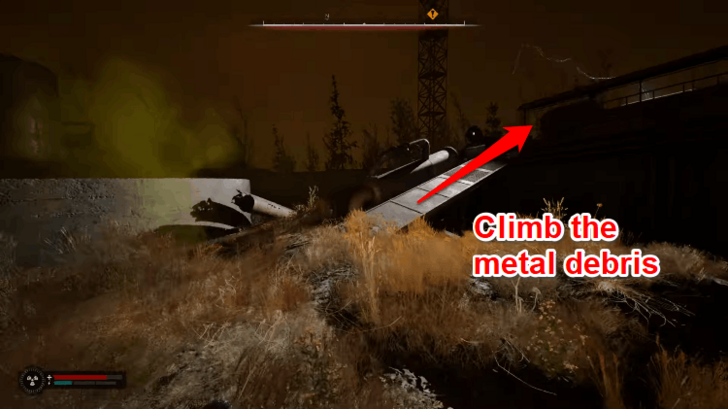
The psi-radiation damage is unavoidable. Ignore it and focus on following the quest markers leading to the next bunker. Once you reach the fallen metal debris, climb it and head up the small ladder on the right.
At the top of the bunker, a blast door will be open. Use the ladder to get inside Bunker Alpha. Once inside, don't waste time since the bunker will have no power. This means the psi-damage caused by the illusions will persist until you can restore power.
Restore Power in the Alpha Bunker
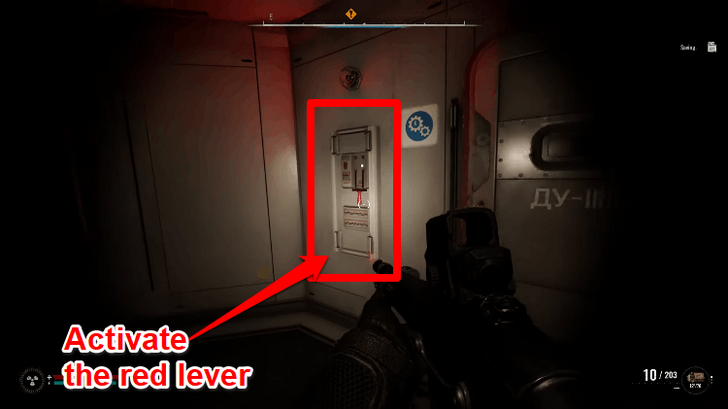
After dropping down into Bunker Alpha, look to your left and go down the hallway. You should see a red lever on the wall to your right. Flip it to restore power to the bunker. This should protect you from psi-radiation so take some time to heal up before the next objective.
Activate the Red Lever on the Control Panel
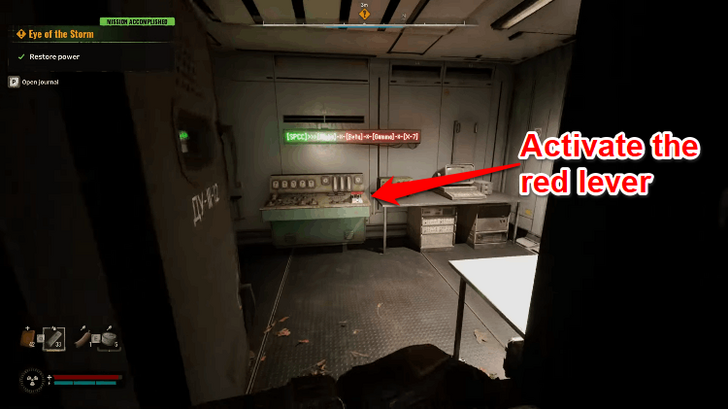
Once power is restored, go to the workstation room (similar location as the first bunker). Activate the red lever on the control panel to trigger more dialogue while you wait out the Emission.
Find the Beta Bunker
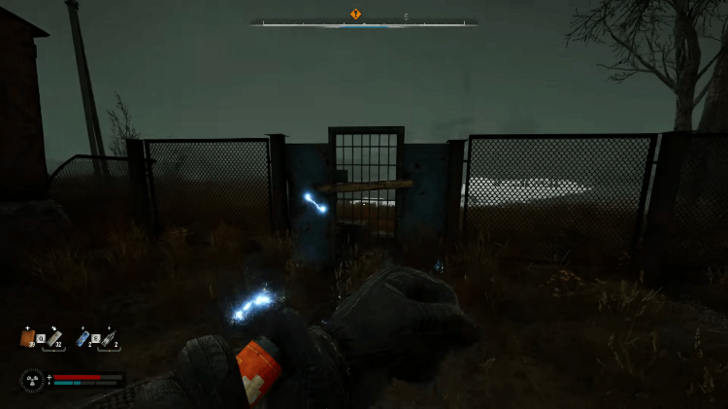
Once you're ready, exit the shelter by pushing the green button on the switch and heading outside.
Outside of the bunker will be several electro Anomalies that you have to pass through to reach a barricaded metal door at the northeastern side of the lot. Shoot at the barricade to unlock the door quickly since you'll be taking psi-damage if you linger too long.
Wade through the Toxic Puddles to Reach the Bunker
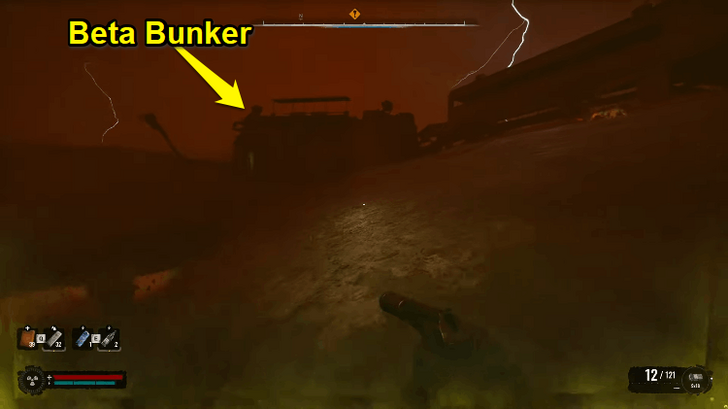
Navigate and wade through the toxic puddles as you reach the next shelter, the Beta Bunker. Be extra careful here since some parts of the water are very deep. One wrong step and it'll be an insta-kill.
Head towards the silhouette of the rectangular building to reach the Beta Bunker and its open front door. Press the red button on the switch to open the inner bulkhead door that leads into the Beta Bunker.
Find the Workstation in the Beta Bunker
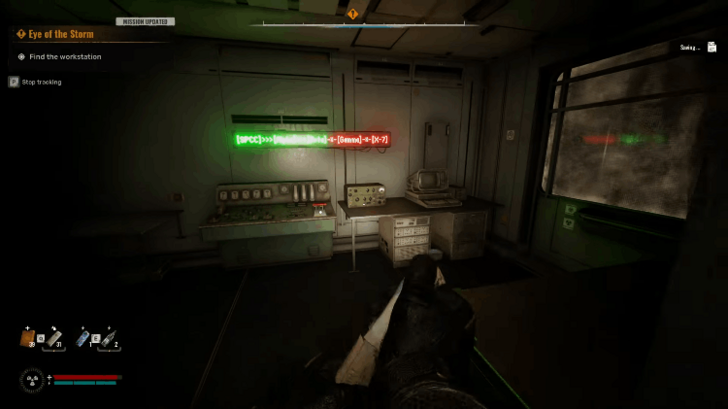
Find the control panel with the red lever inside the shelter and activate it to complete the objective. Once you're ready and healed up, exit the shelter using the ladder outside of the room to reach the next area.
Cross the Ruined Bridge to Reach the Generators
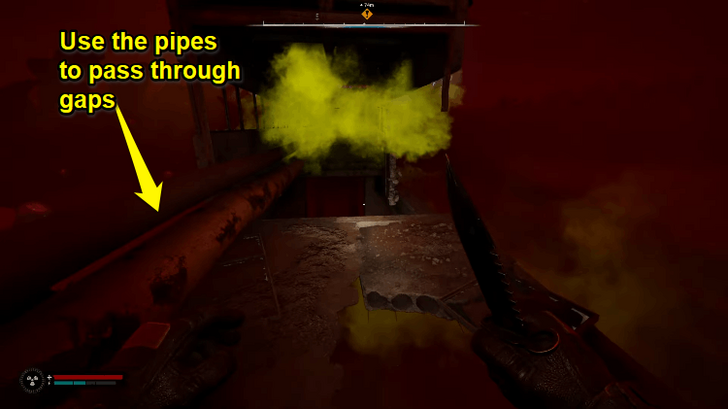
Your next objective is to reach the Generators. Follow the quest marker as you cross the bridge with toxic fumes to reach the imposing structure in the distance.
The fumes are unavoidable so make sure to use Medkits or Bandages after passing through them to restore health. Make sure to take your time during this platforming segment. Damage can be healed, but a fall from that height will send you back to your most recent save.
Once you reach the Generators, the mission will complete while triggering the final main mission of the Ward faction, The Last Step.
Eye of the Storm Rewards
No Mission Rewards
| Rewards | - |
|---|---|
| This mission has no rewards upon completion. | - |
Eye of the Storm Overview
Location and Mission Info
| Eye of the Storm Mission Info | - |
|---|---|
| Starting Location | - |
| Quest Giver | Starts immediately after Down Below |